7 Common Audio Issues on a MacBook and How to Solve Them

Having sound issues on your MacBook can be frustrating, particularly when it happens during a meeting or a presentation. There could be an array of factors that are intervening in the smooth sound outcome, the most common being the volume being muted, or the selection of an alternate output device. 

If you're all set up to call Apple Support - wait, there are a few things that you can try to solve the sound issues on your MacBook. In this article, we will discuss the common sound issues and the potential ways to resolve them. 

Inappropriate Internal Audio Settings

Navigate to your Mac's sound settings to find out the obvious reason. Check if the internal speakers are in good condition and working properly. To do this, go to the Apple Menu, click System Preferences, tap Sound, and then select Output. 

The internal speakers should be selected as the sound output device. If you see another device selected as sound output, select the Internal Speakers and then adjust the volume so that you can hear the sound properly. 

Sudden Malware Attack

Most users won't believe the fact that malware infection can cause a host of technical and functional issues, and sound problems are one of them. If you see excessive pop-up ads when browsing the internet or feel that your Mac is not performing well, it could be a virus. 

Try restarting the computer first, though. If that is not happening and you are asking why won't my Mac shut down properly, you will likely need to get reliable antivirus software to get to the bottom of the problem and fix it.

Improper Hardware Functioning 

NVRAM, also referred to as Random Access Memory, stores information relevant to sound volume, time zone, display resolution, battery health, recent kernel panic, and more. If any of these components stop functioning, you would need to reset NVRAM. 

To reset the NVRAM, first, you need to shut down the MacBook. Next, press the power button while holding the Command + Option + P + R keys for about 20 seconds. Wait to hear the second startup sound or Apple logo appear on the screen. Release the keys slowly. 

Outdated Operating System

An outdated version of macOS running on your Mac can cause sound-related issues. Updating the operating system on a regular basis is important to keep all sorts of security threats at bay. So, update macOS to keep your system working.

To check if your system is running the most recent version, go to the Apple menu, click System Preferences, and then select Software Update. If there is any update or upgrade available, you will see a corresponding button that prompts you to take the required action. 

Malfunctioning Sound Controller

If you're sure that the sound issue on your Mac is not the result of a damaged cable, improper browser settings, or malfunctioning hardware, consider restarting the sound controller. For this, you would need to go to the Activity Monitor under Utilities in Applications. 

In the Activity Monitor, you will see a list of running processes along with the percentage of CPU consumption. Now, type in 'coreaudiod' in the search box available in the top-right corner. Click the heading and click the cross sign to quit the controller. 

Unsuitable Sound Setting in Audio MIDI

Apart from speakers, microphones, and headphones, MacOS processes sound from audio MIDI devices. These devices include drum machines and musical keyboards. If you are still experiencing sound problems on your Mac, use the audio MIDI setup tool for resolution. 

Go to Applications, and select Audio MIDI setup under Utilities. Check the device selected for sound output. To change the output device, select the device, right-click on it, and select the Use This Device for Sound Output option. 

Corrupt Hardware Component

Using the Terminal app on MacBook is quite complicated, but it's a brilliant way to fix common functional issues such as sound problems. Make sure you are familiar with the relevant commands. To open Terminal, go to the Application and tap Utilities.

Once you enter the Terminal window, type in 'sudo killall coreaudiod' and press the Enter key. The command will reset the Core Audio daemon. Check if you are able to hear the sound on your MacBook. If not, move on to the next resolution method. If nothing works, connect a Bluetooth speaker to the MacBook.

The Conclusion 

To sum up, the sound problems on MacBook appear simple, but they are complex to resolve. Before you implement any of the DIY resolution procedures to troubleshoot the issue, It's important to know the root cause. 

If nothing seems to fix the sound problem on your Mac, consider contacting Apple Support or visiting the nearest store for assistance. Using an external audio device can be an alternate solution if you are looking for a quick method to troubleshoot the persisting issue.

E-Waste In 2023: Impact Of Speakers, Headphones & Audio Equipment

According to recent studies, the amount of e-waste generated globally has been increasing rapidly, and audio e-waste is a significant contributor to this problem. As sustainable and environmentally-conscious audiophiles, it is in our best interest to buy and use audiophile technology responsibly.

Electronic waste, also known as e-waste, refers to discarded electronic devices, including mobile phones, computers, televisions, and audio devices. The improper disposal of electronic devices leads to significant environmental and health hazards. The United Nations Environment Programme (UNEP) has estimated that the world generates around 50 million tonnes of electronic waste annually, and this number is expected to rise to 74 million tonnes by 2030 (UNEP, 2019).

Effects Of Audio E-Waste

Audio e-waste is a significant contributor to this problem. In recent years, the demand for audio devices such as headphones and speakers has increased significantly due to advancements in technology and the rise of streaming services. According to a report by Grand View Research, the global earphones and headphones market size is expected to reach USD 45.7 billion by 2025 (Grand View Research, 2019). However, the disposal of these devices has not kept up with the increasing demand, leading to a significant amount of audio e-waste.

The improper disposal of audio e-waste leads to environmental pollution and health hazards. According to a report by the World Health Organization, the exposure to hazardous substances from e-waste, such as lead, cadmium, and mercury, can lead to serious health problems, including damage to the nervous system, kidneys, and reproductive system (WHO, 2017). Furthermore, the improper disposal of e-waste can also lead to the release of toxic chemicals into the environment, leading to air, water, and soil pollution.

Individual Responsibility

To address this problem, the technology industry must take responsibility for the proper disposal of electronic devices, including audio devices. The industry must ensure that the devices are designed with a longer lifespan and are easily repairable, reducing the need for frequent replacements. Furthermore, the industry must promote the recycling and reuse of electronic devices, reducing the amount of e-waste generated. The industry can also promote the use of eco-friendly materials in the production of electronic devices, reducing the environmental impact.

Individuals also have a role to play in reducing audio e-waste. People must dispose of their electronic devices responsibly by donating, recycling, or selling them to responsible companies. In addition, individuals can reduce the need for frequent replacements by taking care of their devices and ensuring that they are repaired rather than replaced when damaged.

In conclusion, the increasing demand for audio devices has led to a significant amount of audio e-waste globally. The improper disposal of audio e-waste leads to significant environmental and health hazards. To address this problem, the technology industry must take responsibility for the proper disposal of electronic devices, including audio devices, and promote the use of eco-friendly materials in their production. Individuals also have a role to play in reducing audio e-waste by disposing of their devices responsibly and reducing the need for frequent replacements. It is crucial that we address this problem now to ensure a sustainable future for our planet.

Reference List

Grand View Research. (2019). Earphones and Headphones Market Size, Share & Trends Analysis Report By Type (In-ear, Over-ear), By Technology (Wired, Wireless), By Application (Sports, Gaming, VR), By Region, And Segment Forecasts, 2019-2025. Retrieved from https://www.grandviewresearch.com/industry-analysis/earphones-headphones-market

UNEP. (2019). Global E-waste Monitor 2017. Retrieved from https://wedocs.unep.org/bitstream/handle/20.500.11822/25496/global-ewaste-monitor-2017-en.pdf

World Health Organization. (2017). Children and e-waste: Addressing the growing crisis. Retrieved from https://www.who.int/ceh/publications/e-waste-children/en/

Surround Sound Placement: How To Place Surround Sound For Best Audio Quality

Ever wondered how to turn your living room into a first-class home cinema?

Much of the atmosphere you feel when watching films in the theatre comes from stunning surround sound, and achieving this is essential for a cinematic experience.

The trick is knowing exactly where to place your speakers so there's no disruption and sound bounce.

It might sound tricky, but don't worry - we've taken the guesswork out of it.

If you want to learn smart surround sound speaker placement, we're here with all the information you need.

From suggesting the best surround sound speaker placement to telling how to do it, we'll cover it all.

So grab your tools, and let's get started!

What Is The Best Setup For Surround Sound Speakers?

Before heading towards technicalities, let's talk about the core components of a surround sound system.

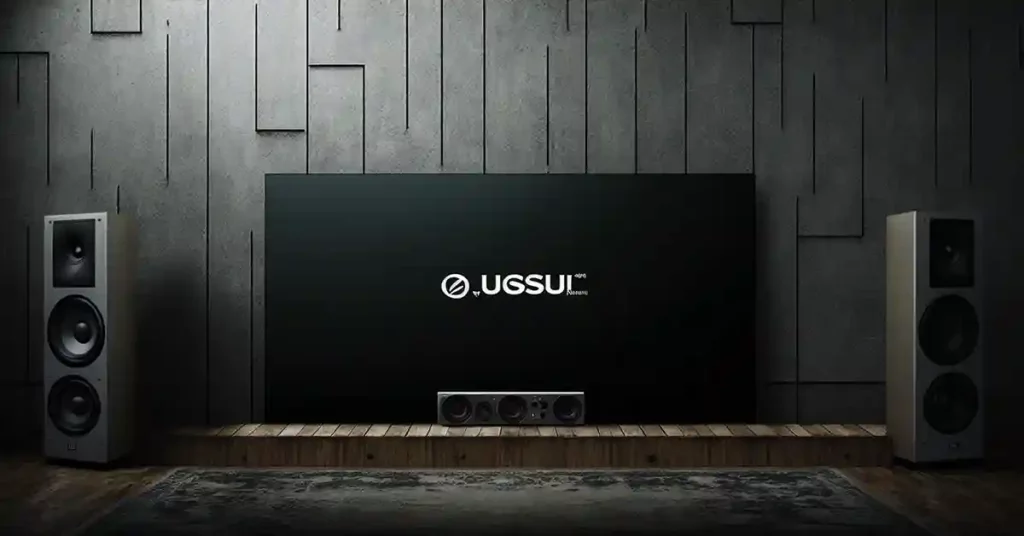
You'll typically have a 5.1 or 7.1 configuration, meaning you've got five or seven speakers and one subwoofer. To make it easier, we'll focus on the 5.1 setups here, but don't worry - the same principles apply to 7.1 systems. Here's the best placement for these:

Centre Speaker

It's called "centre" for a reason! Place this speaker directly below or above your TV, ideally at ear level when you sit. This is where most dialogue will come from, so you'll want it front and centre.

Front Left and Right Speakers

Think of these as the supporting actors in your audio drama. Place them at an equal distance from your TV and at ear level. Imagine forming an equilateral triangle between you, the left speaker, and the right speaker.

Surround Left and Right Speakers

Now, let's get to the fun part - the surround speakers! These awesome devices will make you feel like you're in the middle of the action.

Place them to the left and right of your main listening position, either slightly above ear level or at a height where they can be angled down towards you. Aim for a 110-120-degree angle from your viewing spot.

Subwoofer

Time to bring the bass! Subwoofers can be a bit tricky since low frequencies are less directional. Start by placing it in the front of the room, either in a corner or along a wall.

You can also try the "subwoofer crawl" method to find the sweet spot. Play bass-heavy music, crawl around the room, and listen to where the bass sounds the best. That's where you should place your sub!

General Speaker Placement Guidelines

Your favourite movies and shows sound amazing in theatre because the audio is enhanced by a surround sound speaker system. If you want to ensure the same audio experience at home, follow these surround sound speaker placement guidelines:

Angle It Right

For optimal sound quality, slightly angle your front left and right speakers toward your sweet spot. This helps to create a more immersive soundstage and ensures you get the full effect of your speakers' capabilities.

Triangular Formation

To achieve the best sound experience, arrange your front left, right, and centre speakers in a triangular formation around your listening position. This creates an equilateral triangle between the speakers and your ears, allowing for balanced and accurate sound reproduction.

Surround Sound Love

Place surround sound speakers slightly above ear level and to the sides or behind your listening position. Doing so will make you feel like you're right in the middle of the action, whether you're watching a movie or listening to your favourite tunes.

Subwoofer Shuffle

The placement of your subwoofer can greatly impact the bass quality in your room. Try placing it in a corner or along a wall, and experiment with different spots to find the location that provides the most satisfying low-frequency response.

Distance Matters

Keep your speakers at an equal distance from your listening position. This ensures that sound from all speakers reaches your ears at the same time, creating a more cohesive and immersive experience.

Keep It Off the Floor

Elevate your speakers, especially the front and surround ones, using stands or mounts. This helps reduce reflections from the floor and walls and also helps in achieving a more precise soundstage.

Surround Speaker Placement Guides For Specific Speakers

Have you ever noticed how much more immersive it can be to watch a movie when the sound moves around the room rather than just coming from one direction?

Surround sound speakers let you bring this effect into your home - but if you don't know where to put each speaker, how do you get the best out of them?

Here's how you can place different speakers:

Centre Channel Speaker Placement

Let's first chat about the importance of the centre channel speaker. It's the backbone of your surround sound system, handling dialogue and on-screen action.

So, getting its placement just right is crucial for a truly immersive experience.

Here's how you do surround sound speaker placement for the centre channel speaker:

Find Your Sweet Spot

Before you begin, determine your listening position or "sweet spot" where you'll be sitting while enjoying your home theatre. You'll want to optimise the centre channel speaker placement for this spot. So, grab a tape measure, a notepad, and a pen to jot down some measurements. It's not complicated maths to ensure that your surround sound speaker placement is on point.

Align With The Screen

When seated, the centre channel speaker should be placed directly above or below your screen, ideally at ear level. If that's not possible, don't fret—simply angle the speaker towards your sweet spot. This alignment ensures that the sound appears to come directly from the screen, creating that oh-so-satisfying movie theatre experience.

Mind The Distance

Now that you've got the vertical alignment down let's talk horizontal distance. The centre channel speaker should be the same distance from your sweet spot as your front left and right speakers. It creates an equilateral triangle, providing optimal sound coverage. Whip out that trusty tape measure again to ensure equal distances.

Don't Skimp On The Stand

Invest in a quality speaker stand if your centre channel speaker isn't resting on a shelf or mounted on the wall. This isn't just about aesthetics—solid support ensures stable, accurate sound reproduction. Plus, it allows you to tweak the height and angle with ease.

Avoid Those Pesky Vibrations

Vibrations are the enemy of good sound quality. To minimise them, place your centre channel speaker on a sturdy, non-resonant surface, and consider using rubber or foam isolation pads. These small additions can make a world of difference in sound clarity.

Test Your Surround Sound Speaker Placement

Put your speaker to the test. Play a movie or some music, and sit in your sweet spot. Listen carefully for dialogue clarity, and make sure the sound blends seamlessly with the other speakers.

Calibrate Your System

Lastly, calibrate your surround sound system using the built-in calibration tools of your AV receiver. This process adjusts the levels and delays for each speaker, ensuring an enveloping and balanced soundstage. It's the cherry on top of your speaker placement sundae!

Front Left And Right Speaker Placement

It's time to align your front left and right speakers so the whole setup works harmoniously. Here's how you do it:

Find the Perfect Height

Remember how we picked a sitting spot for the centre surround sound speaker placement? Follow the same rule here and work on it. Next, the tweeters of your speakers should be at ear level when you're sitting down.

This ensures that the sound waves directly reach your ears, providing an immersive and accurate soundstage.

Angle Your Surround Sound Speaker Placement

To get the most out of your front left and right speakers, angle them inward to point toward your listening position. Generally, a 22-30-degree angle should do the trick, but feel free to experiment to find what sounds best to your ears.

Measure the Distance

Ideally, your front left and right speakers should be spaced apart at the same distance as your listening position. So, if you're sitting 10 feet away from your speakers, ensure they're also 10 feet apart.

Avoid Reflections and Obstructions

Reflections can be a real party pooper in audio. Avoid placing your speakers too close to walls or large objects to minimise sound reflections and obstructions. If you can, give them at least two feet of breathing room to prevent sound waves from bouncing off walls and muddying up your audio experience.

Test and tweak your front left and right speakers to match your preferred sound quality!

Bipole And Dipole Speaker Placement

If you've been struggling to accurately place your bipole or dipole speakers into your audio system setup, here's how you fix it:

Choose Your Speakers

Bipole speakers disperse sound in a wide, room-filling pattern, while dipole speakers create a more diffuse, spacious sound. For a home theatre, you'll typically want bipole or dipole speakers as your surround speakers, placed to the sides or behind the listening area. Then figure out the primary listening area, usually your main seating area.

Position The Front Speakers

Place your left and right front speakers at an angle of 22-30 degrees from the centre of the listening area. Ideally, they should be at ear level when seated. A slight toe-in (angling the speakers toward the listening area) can help improve imaging and focus.

Place The Centre Speaker

Put your centre speaker either above or below the screen, aligned with the middle of the screen. Ensure it's aimed at the listening area and ear level when seated, if possible.

Position The Side Surround Speakers

Now for the main event! For bipole speakers, place them slightly above ear level, at 90-110 degrees from the centre of the listening area, to envelop a sound that fills the room. Angle the speakers somewhat toward the listening area.

You'll want to position dipole speakers at 90-110 degrees as well, but at ear level or slightly higher. The goal is to create a more diffuse sound that seems to come from all around you rather than pinpointing the source.

Place The Rear Surround Speakers (If Applicable)

If you have a 7.1 system, you'll need to place rear surround speakers as well. Position these speakers at a 135-150-degree angle from the centre of the listening area, slightly above ear level. For bipole speakers, angle them toward the listening area, while dipole speakers should be parallel to the back wall.

Then calibrate and test your system like usual, and you're good to go!

Placing Dolby Atmos Speakers

With Dolby Atmos speakers, you're essentially trying to create a three-dimensional soundstage that envelops you from all directions. You should position your speakers so that the sound comes from above, below, and around you.

To do this, start by arranging the traditional 5.1 or 7.1 surround sound system as you normally would, with the centre channel below the TV and the front left and right speakers at about a 30-degree angle from the centre.

And to create the overhead effects, add at least two more speakers, ideally four if you have the space and budget.

These Dolby Atmos-enabled speakers should be placed on the ceiling or high up on the walls. For the in-ceiling option, position them directly above your seating area, slightly angled towards the listener, for the best results. If you're mounting them on the walls, try to position them as high as possible but still within a 45-degree angle from your listening position.

Placement Of The Subwoofer

The subwoofer is responsible for those deep, rumbling bass notes that bring movies and music to life. Start by placing it in the corner of the room, as this usually leads to a more even bass response. However, every room is different, so you might need to experiment. One technique you can use is the "subwoofer crawl."

To do this, place the subwoofer in your listening position, play bass-heavy music or a movie scene, and then crawl around the room, listening for the spot where the bass sounds the most balanced. Once you've found that sweet spot, that's where your subwoofer should go.

Things To Keep In Mind When Placing Surround Sound Speakers

Surround sound is one of the most exciting ways to experience movies and games. Follow these tips to get the most out of your surround sound speaker placement:

Every Room Is Different

Each room has its unique dimensions, layout, and acoustics. Therefore, it is essential to consider the specific characteristics of your room when setting up surround sound speakers. This includes the shape, size, and presence of windows, doors, or other architectural features that may affect sound quality.

Not Too Close to Walls, Floors and Ceilings

Placing speakers too close to surfaces such as walls, floors, and ceilings can lead to unwanted reflections and distortions in the sound. Maintaining a reasonable distance from these surfaces when positioning your speakers minimises these issues.

Avoid Corners

Placing speakers in corners can cause sound waves to bounce off multiple surfaces, leading to a buildup of sound energy and potentially muddying the audio. You can reduce these negative effects by keeping speakers away from corners and achieve a more balanced and clear sound.

Avoid Obstructions

Ensure that no large furniture pieces or other objects obstruct the path of sound waves between the speakers and the listening area. Obstructions can interfere with the audio, creating an uneven or muffled listening experience. Positioning speakers in clear, unobstructed paths will ensure optimal sound quality and an immersive surround sound experience.

FAQs

Where should I place my surround sound speakers?

Place surround sound speakers around your listening area: front left/right, centre, and rear left/right. Position them at ear level, angled toward the listener for optimal sound coverage.

Where should I put my 5.1 surround sound speakers?

For a 5.1 setup, put front left/right speakers beside the TV, the centre channel above or below it, and rear speakers at 90-110° from your main listening position.

How do you layout surround sound speakers?

Layout surround sound speakers in a circle or arc around your listening position, with correct angles and distances for each speaker, depending on your specific setup.

What is a typical surround sound layout?

A typical surround sound layout consists of the front left, right, and centre channels, rear left and right channels, and a subwoofer for low-frequency effects.

Summary

Setting up a surround sound speaker system can seem complicated, but it doesn't have to be.

With the right tools - our detailed guide being one of them - and a bit of effort, you can transform your home theatre experience into the ultimate immersive audio adventure.

So don't wait any longer and start putting our tips on surround sound speaker placement into action today.

You might even surprise yourself with how easy it is to get top-notch sound quality in your living room.

LED Speaker Wiring: How To Wire LED Lights To Speakers

Do you want to add a bit of extra life to your home theatre system? Consider wiring LED lights to your speakers and watch them pulse in time with the music.

Whether you want a subtle glow or an explosive rainbow display, adding LEDs can take your entertainment experience from "meh" to magnificent. With just a few supplies and basic wiring knowledge, you'll be ready to rock out in style with custom lighting synced up for optimum effect.

Today, we'll explain how to wire LED lights to speakers so you can create light shows guaranteed to enhance any gathering. Ready to learn this cool skill? Let's dive in!

What Materials You'll Need

Before you learn how to connect LED to speaker, here's a quick list of supplies to keep handy:

Wiring LED Lights To Speakers

When your essentials are ready, it's time to figure out how to make LED lights pulse to music. Doing so will add a visual element to your audio system. The LED lights will sync with the music, providing a lively atmosphere for parties or personal enjoyment.

Here's how you can do this seemingly tricky task:

  1. Connect the LED controller to the audio source. If you have a controller with a built-in microphone (which is the most common), place it near your speakers, ensuring the microphone is facing the sound source. Next, connect the controller to the 12V DC power supply.
  2. Measure the desired length of LED strip lights for your project.
  3. Cut the strip lights along the designated cutting points, typically marked by a line or scissors icon.
  4. If necessary, solder the additional wire to the cut end of the LED strip to reach the LED controller. Use heat shrink tubing to protect the solder joints.
  5. Identify the positive (+) and negative (-) terminals on both the LED strip and the controller.
  6. Connect the LED strip's positive terminal to the controller's positive terminal. And do vice versa for the negative terminal.
  7. Secure the connections using electrical tape or wire connectors.
  8. Before mounting the LED strip lights, test the setup to ensure proper synchronisation between the audio and lighting.
  9. Turn on your audio system and play music.
  10. Turn on the LED controller and observe the LED strip lights.
  11. Adjust the sensitivity settings on the controller (if available) to achieve the desired synchronisation.

If all goes well, congrats - you now know how to make LED lights pulse to music. You can do this for your home stereo, your car's audio system, or when hosting events to add extra pizzazz to the ambience.

List Of Speaker Wire Colours

If speaker wires often confuse you, we got you. Since these wires are not standardised, knowing how to wire LED lights to speakers can sometimes get challenging. But if you remember the following main colour codes in the speaker wire, adding LED lights that flash with bass to your sound system will be easy.

So, here goes:

It might sound complicated, but if you remember these four colours, knowing how to wire LED lights to speakers will get easier.

Which LED Lights Are the Best for Speakers?

Now that you know how you can connect LED lights to a speaker, let's discuss in detail which lights you should get. Since you cannot attach any strip lights to a sound system and call it a day, here's what you must look for if your goal is to lighten up the speaker:

Power Consumption

Choose LED light strips with lower power consumption for energy efficiency. In general, power consumption for LED strips ranges from 5 to 15 watts per metre, depending on the LED density and type. Also note that lower power consumption may lead to less brightness, so find a balance between energy efficiency and the desired brightness level for your setup.

Heat Protection

When understanding how to connect LED to speaker, test its heat protection capacity because light strips can generate heat during operation, especially when used for extended periods. Get LED strips that have built-in heat protection features, such as heat sinks or aluminium channels, to help dissipate the heat. This will help extend the lifespan of the LED strip and reduce the risk of damage to the strip or the surfaces it's attached to.

Voltage and Current

LED light strips typically operate at either 12V or 24V DC. A 24V strip will have less voltage drop, resulting in more consistent brightness along the length of the strip. It's essential to use an appropriate power supply that matches the voltage and current requirements of the LED strip. Always check the manufacturer's recommendations for the correct power supply.

Colour Range and Control

Next up, check the colour range of your light strips while figuring out how to wire LED lights to speakers. Most strips offer a wide colour range and customisable lighting patterns to create a more immersive audio-visual experience. Some LED strips can produce millions of colours, while others offer only a single colour or a limited colour palette. Also, check the control options available, such as smartphone apps, remote controls, or built-in microphones for music synchronisation.

Installation and Flexibility

LED lights that flash with bass should be easy to install and flexible enough to fit your audio system. Some LED strips come with adhesive backing for easy installation, while others may require additional mounting hardware. Flexible strips are suitable for installation around curved surfaces or in tight spaces.

Waterproofing

If you are using LED lights that flash with bass in an area where it may be exposed to moisture, such as outdoors or in a bathroom, consider a waterproof LED strip. These strips typically have an IP rating (e.g., IP65 or IP67) that indicates protection against water and dust.

How to Choose the Right LED Controller?

Another tricky thing you'll come across when learning how to connect LED to speaker is which controller to choose. Ideally, you should get one with sound-to-light or music synchronisation features. These controllers have built-in microphones or line inputs to detect sound and create lighting patterns based on the music's rhythm and intensity.

You can also get an LED controller with a line input. These devices have an auxiliary input, allowing you to connect them directly to your audio source.

Things To Keep In Mind While Wiring Led Lights To Speakers

Now that you know how to wire LED lights to speakers, here are some helpful tips to remember while doing so:

Safety First

Before starting any project involving electricity, disconnect all power sources to avoid any accidental electric shocks. Always carefully handle LEDs and electrical components, and follow the manufacturer's instructions for proper installation and use.

Choose the Right LED Lights

LED lights that flash with bass have different brightness levels, colours, and control options. Choose strips specifically designed for audio synchronisation, as they often include built-in circuits for syncing to music. Also, consider the power requirements, as some LEDs may require external power sources.

Compatibility

When learning how to connect LED to speaker, check your sound system's compatibility. Check the voltage and power requirements of both the speakers and the LED lights to avoid overloading or damaging any components. Verifying that the LED control system can work with your particular speaker setup is essential.

Aesthetics And Placement

Knowing how to make LED lights pulse to music gets effortless when you consider how they appear when synced with your speakers. Do you want them to surround the speaker cones, be placed along the edges, or be mounted on the speaker enclosure? Carefully plan your LED placement to maximise visual appeal while avoiding interference with the speaker's performance.

Consider Heat Dissipation

LED lights that flash with bass can also generate heat, especially when used for extended periods. Ensure proper heat dissipation by choosing LEDs with built-in heat sinks or using additional cooling methods such as fans. Overheating may damage the LED lights and your speakers, so you must monitor their temperature levels.

Test And Fine-Tune

When your LED lights are wired to your speakers, test the system to ensure proper synchronisation and performance. You may need to fine-tune the LED controller settings or adjust the placement of the lights for optimal audio-visual synchronisation. Take the time to perfect your setup to achieve the desired effect and protect your audio equipment from potential damage.

Troubleshooting Common Issues

Knowing how can you connect LED lights to a speaker is a step-by-step process. If you follow them closely, your project will be a success. But sometimes, certain issues can come up, and you should know how to tackle them.

Here are some things you can troubleshoot in LED lights that flash with music:

1.    LED Lights Not Responding To Sound

Here are a few ways you can fix the problem of LED lights not responding to sound:

2.    Uneven Brightness Or Colour Issues

If your LED lights that flash with bass show uneven brightness, try these tricks to overcome this trouble:

3. Controller Connectivity Problems

Another common issue people face when learning how to make LED lights pulse to music is the connectivity aspect. Here are a few ways to tackle it:

FAQs

Can I wire LED lights with speaker wire?

You can wire LED lights with speaker wire as both are designed to transmit electrical current. However, it is not always the ideal solution. Speaker wire is generally intended to carry audio signals rather than providing power to devices like LED lights. So understand this point while learning how can you connect LED lights to a speaker.

Can you use speaker wire for low-voltage LED lights?

While it is possible to use speaker wire for low-voltage LED lights, it is not recommended. The speaker wire is designed for transmitting audio signals, not for delivering power. Doing so can lead to insufficient power delivery, voltage drops or even overheating, potentially causing damage to the LED lights or creating a safety hazard. Instead, you should use wires specifically designed for low-voltage LED lighting applications.

Can I use a speaker wire for 12V LED lights?

Not always. It is better to use wires specifically designed for LED lighting applications, as they will have the appropriate gauge, insulation, and connectors to ensure proper functionality and safety.

How do I connect LED lights to my home theatre?

To connect LED lights to your home theatre, follow these steps:

Rounding Up

When testing how to wire LED lights to speakers, keep in mind the specifics of what type of wiring, tools, and materials you'll need – as well as know how to properly configure them.

Whether it's your first time taking a crack at this project or you're well-versed in home improvement tasks, the satisfaction of successfully installing LED lights is worth the effort once they're up and running. With good planning and attention to detail, you can create stunning visuals that offer endless opportunities for creative expression - all from the comfort of your home!

Hang Speakers From Ceiling: A Step-By-Step Guide To Hanging Ceiling Speakers

Imagine walking into a room where music floats through the air, filling every corner with rich, vibrant sound, as if suspended by invisible hands.

This dream can become a reality when you hang speakers from ceiling, allowing your home to resonate with a symphony of sound.

Like an artist delicately crafting their masterpiece, you too can create an immersive auditory experience. Today, we'll walk you through the process of hanging speakers from the ceiling, step by step, so you can savour the sweet notes of success.

Since you can use different mounting methods, we'll explain them one by one to ensure you have all the necessary information to complete this task.

So, get ready to level up your place's sound experience!

How To Hang Speakers From Ceiling

Installing a good speaker system in your home can make or break the audio quality of your movies, music, and games.

And if you're going for a ceiling mount, follow the below-listed steps to hang your speakers!

Gather your trusty tools to ensure your project is a success. You'll need the following:

It's time to work now!

  1. Before embarking on this DIY adventure, you must select the perfect speakers for your space. For instance, if you're installing speakers in a home theatre, you may prefer surround sound speakers so nothing disturbs their audio quality.
  2. Next, determine the ideal locations to hang speakers from ceiling. Consider factors such as room layout, furniture arrangement, and listening preferences.
  3. It's like finding the sweet spot in a symphony hall where the music envelops you in a warm embrace. Use painter's tape or sticky notes to mark the chosen spots.
  4. When you set out to hang speakers from ceiling, thoroughly analyse your workspace to understand which part will go where. Use the stud finder to locate the ceiling joists near your marked locations. You'll want to attach your mounts to these sturdy beams, ensuring your speakers remain suspended securely.
  5. Measure and mark the precise spots to hang speakers from ceiling, considering the distance between the joists and the mounts' placement. Remember to double check your measurements, as accuracy is key to hang speakers from ceiling.
  6. Next, drill pilot holes at your marked spots, ensuring they align with the ceiling joists. And attach the mounting brackets to the ceiling.
  7. If your chosen mounts don't come with their hardware, use heavy-duty anchors, screws, and washers. Secure the brackets tightly so they don't budge an inch – a firm foundation for your audio system.
  8. As you prepare to hang speakers from ceiling, you'll need to run speaker wire from your audio source to each speaker's location.
  9. Fish the wire through the ceiling or use a raceway to discreetly run it along the wall and ceiling. Strip the ends of the wire, exposing the copper strands. If necessary, use wire connectors or banana plugs for a secure connection.
  10. With your mounts and wires ready, it's time to hang the speakers. Follow the mount manufacturer's instructions, ensuring the speakers are firmly secured.
  11. Attach the stripped or connector end of the speaker wire to the corresponding terminals on each speaker, paying close attention to polarity (positive and negative connections).
  12. Turn on your audio source, adjust the volume to a comfortable level, and listen closely.
  13. Fine-tune the speaker angles and positioning if necessary to achieve the perfect acoustic balance.

With your speakers successfully hung and tested, ensure the wires are neatly tucked away or secured with cable ties. This step is like tidying up your workspace after completing a masterpiece – leaving no trace of the creative chaos behind.

Now that you've managed to hang speakers from ceiling, it's time to reap the rewards of your hard work. Sit back, relax, and let the music wash over you like a cascading waterfall!

Are you looking for a different method of hanging speakers? Here are other ways how you can hang speakers from ceiling:

Using Chains To Hang Speakers

We all know that stand-mounted speakers are often bulky and intrusive, so mounting them from the ceiling can be an excellent space-saving solution for any room in your home. But it's important to ensure you've properly installed them according to safety standards - if done wrong, then not only could it ruin sound performance but also cause serious injury.

Let's see how you can hang speakers from ceiling using chains!

You'll need the tools we listed above, along with the following:

Before we start the installation, it's crucial to choose speakers suitable for ceiling mounting. Make sure they have mounting brackets or holes at the back. As for the chains, select sturdy ones that can hold the weight of the speakers.

  1. Then, use a stud finder to locate the ceiling joists around the marked areas. Attaching the hooks to the joists for added support and stability is important.
  2. Drill pilot holes into the marked spots, ensuring you're drilling into the joists or using wall anchors. Then, screw the ceiling hooks into the pilot holes tightly. Double-check their stability by gently pulling on them.
  3. Attach an S-hook or similar connector to the speaker's mounting bracket or hole. If your speakers have a keyhole slot, you might need to attach a small screw or hook to the speaker's back, and then connect the chain to it.
  4. Now, hook one end of the chain onto the S-hook connected to the speaker. Repeat this process for all your speakers. Then, lift the speakers and hook the other end of the chains onto the ceiling hooks. Make sure the chains are the right length so the speakers hang at your desired height.
  5. Lastly, adjust the angle of the speakers to point toward your preferred listening position. Some speakers have built-in angle adjustment options; others may need additional hardware like ball-and-socket mounts.

Using A Net To Hang Speakers

Using a mesh net is another way to hang your bulky speakers. The best part? Doing so doesn't take much effort. Here's how you can hang speakers from ceiling using a net:

  1. To start, make sure you select the right mesh netting for your project. Get a durable material like nylon or polyester with a high weight capacity to safely support your speakers.
  2. Don't forget to measure your speakers beforehand and purchase a large net to accommodate them.
  3. Following the manufacturer's instructions, drill holes and install ceiling hooks or anchors at the marked spots. Make sure they are securely fastened and capable of supporting the weight of your speakers.
  4. Now, cut your mesh net into the desired shape, ensuring it's large enough to securely hold the speakers. Attach the net to the ceiling hooks or anchors using carabiners or S-hooks while keeping it taut and level.
  5. Carefully place your speakers in the mesh net, distributing their weight evenly. You can use cable ties to secure the speakers to the net if needed. Make sure the speakers are facing the correct direction for optimal sound coverage.
  6. Once the speakers are in place, connect the speaker wires or cables to your audio system. Be sure to hide or secure any loose cables to prevent them from hanging down or becoming a tripping hazard.
  7. Power up your audio system and test the sound quality. Adjust the speaker position within the mesh net to achieve the desired audio experience.

Hanging Different Types Of Speakers

As an audio system’s aficionado and DIY enthusiast, you must know the nuances of setting up various types of speakers to create the ultimate listening experience.

Let's dive into the distinctions you might encounter when hanging these speakers.

Heavy Speakers

As the name suggests, these speakers tend to be more substantial, often ranging from 30 to 100 pounds or even more. Because of their heft, hanging heavy speakers presents unique challenges.

One of the primary concerns is ensuring that the wall or ceiling can support the speaker's weight without causing any structural damage. You'll also need brackets, mounts, or other hardware specifically designed for heavy speakers to ensure they remain securely in place.

Bookshelf Speakers

Bookshelf speakers are smaller and more lightweight than heavy speakers, usually weighing around 10 to 20 pounds. They are designed to fit on shelves or in other compact spaces. While hanging bookshelf speakers may be less challenging than hanging their heavier counterparts, there are still some differences to remember.

Bookshelf speakers often have smaller drivers and are designed to provide a more intimate listening experience, so their placement is crucial to avoid audio distortion or imbalance.

Since these speakers are lighter, you might have more flexibility in terms of the hardware you use to hang them. However, be mindful of their compact design, as it could limit the number of mounting points on the speaker, which may affect how you secure them to the wall or ceiling.

Surround Sound Speakers

Surround sound speakers are designed to work together as part of a larger audio system to create a more immersive listening experience. As a result, hanging these speakers requires careful consideration of their placement relative to one another and the listener.

This is critical for creating the intended sound field, which usually involves speakers positioned at specific angles and distances from the listener.

One key distinction when hanging surround sound speakers is the need for precise positioning of front, centre, and rear speakers. You must consider room size, shape, and acoustics to ensure the best sound reproduction.

For example, you might hang rear speakers slightly above the listener's ear level to achieve a more immersive audio effect.

How To Hang Speakers From A Drop Ceiling?

If you have a drop ceiling, follow these steps to hang speakers so you can enhance their sound experience:

  1. Measure your room and determine the optimal placement for your speakers based on the size of the room and the desired audio effect. The general rule of thumb is to place front speakers at ear level and surround speakers slightly above ear level.
  2. Most speakers come with brackets or mounting holes on the back. If your speakers don't have brackets, you must purchase speaker mounts specifically designed for your model. Attach the brackets to the speakers using the screws provided with the mounts.
  3. Locate the support points for your drop ceiling. These are typically metal gridwork suspended from the building structure.
  4. Cut the drop ceiling wire to the desired length using wire cutters. Attach one end of the wire to the ceiling support and the other end to the speaker bracket. Alternatively, you can use clips specially designed for drop ceilings to attach the speaker bracket directly to the metal grid.
  5. If necessary, drill pilot holes into the metal grid using the appropriate drill bit. Then, insert the anchors or fasteners provided with the speaker mounts. This will help secure the speakers and prevent them from falling.
  6. Attach the speaker bracket to the drop ceiling wire or clips, and use the level to ensure the speakers are straight. If using clips, slide the clips into place on the metal grid and secure them tightly.
  7. Now that your speakers are securely hung, run the speaker wire from each speaker to your audio system. Make sure to run the wires along the ceiling grid, using clips or wire ties to secure them. This will help maintain a clean and organised appearance.

FAQs

Can you hang speakers from the ceiling?

You can hang speakers from the ceiling using appropriate mounting hardware and following safety guidelines. This may require special brackets, mounts, or wires to ensure secure installation and prevent damage or accidents.

Do speakers sound better in the ceiling?

Ceiling speakers can provide a more immersive sound experience by evenly distributing audio throughout the room. However, whether they sound better depends on room acoustics, speaker quality, and personal preference. Proper positioning and angling are crucial to optimise sound quality.

Can you ceiling mount bookshelf speakers?

You can ceiling mount bookshelf speakers, but use the correct brackets or mounting systems designed for this purpose. Proper mounting ensures the speakers are securely attached to the ceiling, minimising the risk of falling or causing damage.

Do ceiling speakers need a bracket?

Yes, ceiling speakers typically require brackets or mounting systems for secure and safe installation. These specialised components ensure the speakers are firmly attached to the ceiling and maintain the appropriate angle for optimal audio performance. Always choose brackets or mounts that are compatible with your specific speaker model.

Rounding Up

Now that you know what materials are necessary and the steps to hang speakers from ceiling, you have all the information you need to tackle this project.

With proper planning and time, hang your speakers today and watch your home theatre experience come alive with sound. You can be sure that your favourite entertainment will perpetuate into post-season fun no matter what your living space looks like.

So don't hesitate and hang those speakers, for it is an easy process that can revolutionise how you enjoy music and movies with family and friends!

Subwoofer Boxes: Ported vs Sealed - Which is Better?

Which sub will provide the best design and sound quality, ported or sealed? Does a sealed or ported box hit harder? Adding a quality subwoofer is best for a full and rich bass. 

Adding a sub helps in improving your audio system. Generally, there are two types of bass camps, one that like the bass "boomy" and the other that like the bass "tight." The bass type you prefer depends on your taste and personal preference in music. 

Ported vs. Sealed Box — Which is better?

When talking about subwoofer enclosures, sealed and vented boxes are the two most popular options. Just like other decisions, some trade-offs come with each choice. So what is better between ported vs. sealed subwoofer home theater system?

Sealed box vs. Ported box – How are they different? 

The type of bass you will get depends on the subwoofer that you are using. If you want tight bass, you should go for the sealed design. But if you like your bass booming, you should go for the ported subwoofer box design.

Subwoofer TypeBass Sound
Sealed BoxProvides more accurate and higher bass.Smaller in size.Requires higher power for more bass.
Vented or Ported DesignLess accurate but boomy and louder base. Larger size, thus requiring larger space. Highly efficient with lesser power requirement. 

Sealed Subwoofer Boxes

A sealed subwoofer box design is air-tight. Therefore, the air gets trapped inside the box and works like an absorber. Because of this, the sealed enclosure is not that loud compared to the ported box. When the cone starts vibrating, the air works like a cushion. 

When using a sealed subwoofer box, you will get a better and richer experience that is not very loud. Moreover, the bass is also quite tight regarding lower frequencies. The air adds to the richness of the audio and makes it more accurate. 

Having a sealed box will allow you to ensure that appropriate heft and bounce are being added to the background music. Thus, you will not miss out on the critical parts. Even with music, the box doesn't drown the vocals and the background instruments. 

Sealed Design: Pros & Cons

ProsCons
More constrained and smaller in size.If you want to enhance the bass, you will need power amplifiers.
Size has no impact on the output.The possibility of getting a loud bass is minimal.
Better and more detailed audio. 
It doesn't drown other background instruments or important dialogues. 
Provides a holistic experience.

Ported Subwoofer Design

If you looking for a higher reverb or booming bass, then the ported subwoofer boxes are ideal. It has an outlet in the box for any air present inside. They also redirect the sound properly, creating a sound whammy. 

They do not require an amp but can also work well with an amp. The cone gets larger movement opportunities as there is no trapped air. Because of this, the reverberations are higher. 

The air dynamic of the port makes the cone stronger. Because of this, you also get bass and sound from the port. But this means that these boxes are larger than sealed air boxes. 

Subs with ports have a larger cone to allow capturing of lower bass.

Ported Subwoofer Design: Pros & Cons

ProsCons
Helps in lesser distortion.Powerful bass that can overpower everything else. 
Louder and higher bass.Outside air can impact the quality. 
Comparatively more efficient than sealed boxes.Large in size and thus can be difficult to move around. 
Higher reliability. High internal pressure can result in cone damage. 
Amps are optional.

What Should be the Room Size for a Sealed or Ported Subwoofer Enclosure?

When deciding between a sealed or a ported sub, the size of the room matters. A very large room will not be ideal for a sealed box as it will not reach louder or deep bass. Moreover, a sealed box might not reach similar bass frequencies. 

Similarly, a ported box will not be ideal for a small room. It is not the better choice if you use it with your home theater and want to listen to dialogues. 

Sealed vs. Ported: Key Differences

Sub Cone Excursion & Distortion 

As the cone excursion increases, there is more distortion in the coil speaker. Moreover, the suspension compliance variation and the magnetic field result in the cone being unable to track the signal properly at higher excursion levels. 

Therefore, keeping the cone excursions as low as possible is critical. A larger sub will improve the sound quality if the enclosure is designed correctly. The cone excursion is higher in sealed boxes as compared to vented boxes. 

Enclosure Size

The sealed boxes have smaller enclosures than the vented boxes. Ported subwoofer box 12 inch are the most common size of ported boxes. if you have a smaller space getting a sealed box is a better idea.

Efficiency

The ported box is louder than the sealed box at any frequency range greater than 18.5 hertz. If you want a system with the most output, you should go for a vented enclosure. 

Sound Quality

If your system has an equalizer getting a vented or ported box is a better option. But you can get a sealed box if your system doesn't have an equalizer. 

Infrasonic Performance

The answer to ported vs. sealed car subwoofer also depends on your requirement. If you love deep bass in the vehicle, getting a sealed box is better for your car audio system. 

Limited Xmax Subs

If the idea is to have an enclosure with limited sub-excursion, then getting a vented box is better. It can be an entry-level woofer with a shorter magnetic field. 

Enclosure Cost

If you want to know how to port a sealed sub box and how much will it cost, then understand that the cost of building a ported box is higher than a sealed one. However, the performance might help offset the cost. 

Application of Sealed vs. Ported Enclosures

Sealed Box

Ported Box

FAQs

Why Do You Need An Enclosure For A Subwoofer? 

It helps prevent sound mixing from the speaker cone's back and front. They help in limiting the output at lower frequencies. 

Should I Go For A Sealed Box Or A Ported Box? 

You can get a ported box for loud and deep bass, but you can choose a sealed box for detailed audio. It depends on your sound requirement. 

Is It True That Sealed Subs Sound Better? 

The sealed boxes provide a softer and more consistent bass. And thus, they might sound better when you want to focus on the dialogue or not miss any instrument in the music. At higher volumes, you will be able to get detailed audio. 

Are Ported Boxes Louder Than Sealed Boxes?

The ported box is significantly louder than a sealed box. It is as high as double the sound coming from a sealed box. They perform well at high volumes. 

Is It True That The Sealed Box Is Louder? 

A sealed box is not booming or loud like a vented box. Thus, it is well-suited for people looking for a thing to provide accurate bass. 

What Is The Difference Between A Ported And Sealed Box? 

A ported sub comes with a small hole or a port opening that allows air movement to pass out of the box resulting in a deeper bass. But in a sealed sub-enclosure, the air gets trapped inside. 

Are There Any Benefits To The Ported Vs. Sealed Box Subwoofer Design?

The ported box has a vent, and the air pressure gets out of the enclosure through the port resulting in a louder bass. 

What Are The Pros And Cons Of A Ported Box?

The ported enclosure provides a louder bass and can easily manage low frequencies. But they are larger and can also get very loud in small spaces. 

Which Subwoofer Is The Best Sealed Or Ported?

A sealed box will provide tight sound but is less efficient than a ported box. Moreover, it will require higher power for the same high-quality sound. The best subwoofer choice eventually depends on the requirement and the floor space.

Phase 0 or 180: What Phase Must I Set My Subwoofer To?

If you have recently joined the world of speakers, you might not know speakers can get "out of phase." But there is no need to worry, as it will not damage or affect the other electronic items plugged in.

Sub "out of phase" is something common and minor that you can easily resolve by manipulating the settings. It means that the wiring is not correct, and the sound waves are not accurate. 

But what is the meaning of subwoofer phase control? And how is phase 0 different from phase 180? Let's find out.

Subwoofer with dials and knobs on back plate that are set between 0 and 180.

What Is The Meaning Of Phase Control?

Phase control is the delay in the signal of your speakers. When you change the phase settings, both the speaker and the sub will start pumping music in one direction simultaneously. 

You can choose between dual subwoofer phase 0 or 180. Your phase settings will also depend on how you place the speaker and subwoofer in the room. 

Ensuring the phase settings are right is critical to get the best sound quality. 

How is Subwoofer Phase 0 Different from Phase 180?

Phase 0 Subwoofer

Phase 0, or "normal phase," is a dual subwoofer phase setting. When you select the phase 0 setting, the sub is in the same phase as the speakers

Because of this, you will get clearer and louder audio as both the sub and speaker are pumping it outwards simultaneously. It is an ideal setting for people who want the maximum possible bass frequencies. 

Phase 180

It is the polar opposite of the normal phase or phase 0. In the phase 180 setting, your speakers will not be in sync with your sub. Rather they will go against the subwoofers

While the sub will pump inwards, the speaker will continue pumping outwards. And this will result in a lower output bass.

What to Choose: Subwoofer Phase 0 or 180?

People often want to know what to choose between subwoofer phase 0 or 180 on Reddit and other platforms. The final setting of the phase will ideally depend on the placement of the sub and speaker in your room. 

When your sub and speaker are placed together and pointing in a single direction, it is better to put your sub on phase 0. 

But when the speaker and sub are not facing the same direction but are on opposite sides of the room and pointing toward one another, it is better to set your sub on phase 180.

To decide the right settings for your sub, you must check the sub's positioning against the main speaker and its decibel reading. 

Positioning of Your Speaker Will Decide the Phase

The phase setting will primarily depend on the position of your sub against the main speakers. Usually, both speakers are placed adjacent to one another in most cases. 

If the sub and the main speaker are in the same direction, there is no need to flip or change the phase switch. 

When the sub faces the opposite direction compared to the main speaker, it is better to stick to phase 180. 

You must try different settings before choosing whether to keep the subwoofer phase normal or reverse.

Sound Quality

It is a crucial factor that can help you decide on the phase switch requirement. The best way is to play a song on your subwoofer phase car audio to gauge if the bass is good enough. 

The bass and low frequencies will not sound correct if they are out of phase. You can use the phase switch to set the phase of your sub again. 

Reading of the Decibel

Another critical way to find if there is a need to change the phase settings is by decibel reading. While a subwoofer phase calculator can be handy, you can use the SPL meter in this case. You can install any app on your phone if you don't have the SPL meter.

The SPL meter will allow you to choose between phase 0 and phase 180 while checking the setting that provides you with the highest frequency response graph under different crossover areas of your sub. The cross-over area in a sub is usually around 80Hz. 

How To Find Out If The Sub is Out-of-phase?

Getting an expert to check if the sub is out of phase is unnecessary. 

Make Use of an SPL Meter 

You can get a SPL meter or a sound pressure level meter to gauge how it responds to the noise. Getting an SPL meter is easy, as you can find it in any online store. You can also use any app on your iPhone or Android device. 

Look for Thin Bass

When you don't have an SPL meter and want to use another technique, you can start by listening to the phase issues. When your sub is not in phase, you can find out that there is no bass sound. 

Keep in mind that manual spotting might have human error. Therefore, it is always better to get an SPL meter. 

Tips To Set The Subwoofer Phase

After finding out that the sub is not in phase, the question is, how can you get it to the right phase?

You will require a digital switch to ensure your sub is in the right phase. The switch will help you in changing the sub-phase. Now choose one of the below options. 

Method 1

When your sub and speaker are placed together on one side of the floor space and are also pointing in one direction, use the switch and change it to 0. 

Method 2

When your sub and speaker face one another and are on different sides, switch to phase 180. 

FAQs

Which Is Better, Subwoofer Phase 0 or Phase 180?

None of them are better than their counterpart. The goal of car subwoofer phase 0 or 180 aims to ensure you get the best audio experience as your sub is in sync with the speaker system. If you feel that phase 180 is better, set it accordingly, But if you like the sound of phase 0 better, choose phase 0. 

Does Selecting Phase 180 Result in Muddier Sound?

Some might feel that choosing phase 180 for the sub results in a muddy sound. To be clear, there are no wrong or right answers to the sub-phase. It is ultimately on the individuals to experiment and choose the phase that produces the sound best suitable to them. The only way to find the right phase is by experimenting. If you feel that phase 180 is resulting in a muddy sound, try switching to subwoofer phase 90 or others. 

How Critical is Phase to Subwoofer?

The phase angle is critical for a sub because the sound of the sub should be in sync with the speaker's sound. if it is out of phase, the subwoofer sound will be weak. 

What Is The Crossover Frequency?

It is a frequency in which the subwoofer has a high-cut filter. Thus, the sub will be able to play only frequencies that are below its threshold. 

How Does An Out Of Phase Sub Sound?

It will sound imprecise and flabby. 

What Is The Ideal Phase For A Subwoofer?

Depending on your audio preference, you can set it anywhere between phase 0 and phase 180.

What Is The Normal Or Reverse Subwoofer Phase?

The normal phase means the left and right speaker and the sub are in the same direction; the reverse phase refers vice-versa. 

How To Use The Phase On A Sub? 

You can use the sub's phase knob to control the base. Selecting anything between the 0-180 setting will provide you with the best subwoofer experience. 

What To Do If I Don't Own An Spl Meter?

You can install an app on your smartphone to find the subwoofer's phase settings. 

What Are The Best Performance Frequencies For A Subwoofer? 

Usually, any frequency between the 128-160 range provides the best audio quality. Lower than that will result in less bass notes, and higher will result in a muddy sound. Now hit the sub's volume level and get ready for some music.

What Is Considered The Best Frequency Cutoff For A Sub?

80-100hz is considered a great starting point for a sub. 

Is It Necessary To Have A Crossover?

To get the best sound experience, it is always better to have a crossover. The crossover region will allow you to low-pass filter the sub. 

What Role Does The Phaser Switch Play? 

It helps you in controlling the phase of your subwoofer.

Subwoofer Hums: Fix Humming Subwoofer Sounds Easily!

Imagine yourself getting a new sleek speaker for the sound system for the best audio experience. But when you finally play the music, you notice something wrong. Nothing can be more frustrating than hearing a hum from the subwoofer.

It is a common technical problem as people complain of subwoofer hum with input and subwoofer hum with no input. And what's worse? It shows no sign of getting better. The below article will help you with tips to fix the issue. 

Subwoofer Hum Common Causes

When switched on, a subwoofer hum refers to any low-level sound or noise emitted by a powered or passive subwoofer. It is a 60Hz hum that happens when you plug the subwoofer into the wall outlet. 

There are instances when you will be able to notice the hum, and in some cases, you will need to focus on it. Either way, this subwoofer rumbling noise can be fixed. There is no need to filter the noise, which will also impact the audio signal. Let's find out how to fix subwoofer buzzing!

Subwoofer Hum: How to Fix?

You can choose different methods to fix the subwoofer hum issue. If any one of the methods doesn't work, you can choose the others. 

Try Changing the Polarity

Changing the polarity of the connection is one of the simplest fixes you can try. All it requires is to reverse the power plug's orientation. It is possible that one of the prongs is wider, and this might be preventing the reversal. 

You can make use of an AC adapter for reversing the polarity. These adapters come with uniform prongs and are readily available. 

Try Reversing the Other Plugs

People often complain that the subwoofer hums when rca plugged in. The truth is when different components use the same power source; then the reason might not be your subwoofer. The noise can be because of an AC plug. Start by reversing the plugs' orientation to check if it solves the issue.

Try Separating the Cables

If you cluster the cables together into bundles, the signal will bleed. It will result in noise or hum as they are very close. Ideally, you should distance the cables so that the electrical fields do not interfere. If separating them is impossible, you can get high-quality cables with effective shielding. 

Try Switching the Outlets

There are cases when the hum is because of the ground loop problem. It happens when there is a second device also trying to gain possession. If there is other equipment using the same outlet, surge protector, and power strip, then you should ideally move the sub to another circuit.

Get a New Audio Isolation Transformer

When none of the above techniques work, you can think of getting a new audio isolation transformer. There are many such transformers available that are designed dedicatedly for subwoofers. They can easily get in line along the cables and help with the ground loops.

How to find what is the cause of the hum?

You can run some tests to find the root cause of the hum. Start by changing the volume and excluding different points to see its effect on the hum. 

The best way to get an answer is to remove your sub's cinch cable from the input. If it stops humming, the humming loop is the culprit.

But if the hum continues, the problem is either with the cables or mains interference.

Subwoofer Hum: Step-by-Step Troubleshooting Guide

There can be different reasons that can result in the subwoofer hum. There are different fixes for each of the reasons. Let us look at the steps you must take after identifying the reason of the hum. 

1. Look at the Sub's Connection

Start by checking the orientation of the power cord. It is possible that the plugs are reversed, resulting in the hum. 

When checking the prong, look for signs that prove that one prong is wider. Furthermore, try to switch the cables that connect to the subwoofer's rear. 

If there is one source powering the components, the AC plug is most likely causing the hum. 

2. Check If the Signal is Bleeding Over or if There is Interference

It is common for the signals to bleed over, resulting in the hum. The cables get bundled together, and this is a common cause. 

Subwoofers are easily able to broadcast the interference, and this results in the hum. Try using a rack that can help with cable management. Avoid cluttering the cables, as it will help with signal bleeding.

3. Check the Ground Loop

Another common cause of the subwoofer hum is the ground loop. To confirm if you have identified the cause, you must check if two or more devices are connected to one common ground. 

But note that this is rare and usually happens when the sub is connected to the receiver causing interference with the TV connection. 

You can easily fix it by connecting the wire available to the screw chassis of the sub, and it's another side to anything grounded. 

4. Look at The Sub's Internal Amplifier

Most 50 0r 60Hz hum is because of the leakage into the amplifier by the supply side. Sometimes it can be because of the amp itself. A power surge can damage the amplifier. 

It is possible that any component of the amp is damaged; else, there is a loose connection. But one common reason that results in the hum is the capacitor of the amplifier or its power supply. 

Check the components and the capacitor of the amp. If you see any problem replace the capacitor. 

If the issue with the amp is because of a sudden power surge, it is better to get a good surge protector. 

5. Noise in the AC Line

You will have different electronic devices causing interference on your AC mains. Some devices that can cause this are hairdryers, washing machines, blenders, and others. Moreover, light dimmers, as well as fluorescent fixtures, also result in interference. 

A common method to check this is by checking the TV for any effect having jagged lines. The best solution to deal with this is turning off other devices when using your sub. Or you can wrap your subwoofer's power cable with the ferrite ring to have the power choke. 

How Do I Fix the Subwoofer Hum When It is Because of Malfunctioning Sub Parts?

When you are sure that there are no issues in the different parts of the sound system resulting in the subwoofer hum, then it is possible that the problem is the subwoofer itself. After checking the cables, connections, outlets, and all the other devices, you can deduce that the issue is the sub. 

When the malfunctioning sub is causing the hum, consider the below options.

Seek Help From a Technician

If you do not know the issue inside the subwoofer but are sure that the sub is malfunctioning, it is better to take the sub for repair. 

You can hope that there will be minimal repair requirements. In the worst case, you can upgrade the sub to a higher quality when the repair cost is high. 

Continue Listening to the Hum

When you do not have any other solution, and your hands are tied, you can only leave the humming in the sub and choose to take it up in the future. 

If you are sure there is no other issue and the problem is because of the malfunctioning woofer, then you can leave it for now and continue dealing with the hum. You can upgrade your sub as soon as you find a suitable time. 

What Are the Inputs of a Subwoofer?

Most of the subwoofers use low frequency effects or LFE cables as inputs. Other subs also use RCA connectors or the right & left inputs. 

The system forwards low frequencies in the right and left channels in RCA. When your sub comes with the common LFE option, you are highly unlikely to utilize the right and left inputs. But it is possible to use the left and right cable inputs if the sub doesn't have an LFE cable option. 

An LFE cable helps in connecting the receiver and the subwoofer. And since the subwoofer helps produce lower bass, adding a transmitter that emits low-frequency sound waves back into the sub's system is better for the best sound quality. It is common to combine both the left and the right channels in one single cable. 

FAQs

How To Stop My Sub From Humming? 

In case your car subwoofer makes loud humming noise then you can stop the hum easily yourself. Start by disconnecting the antenna from your receiver when using any receiver as the source. And if the hum stops, you can start using a sheath current filter to eliminate the cases of hum loop. 

Why Does My Subwoofer Hum? 

Different reasons can result in making your subwoofer hum. The difference in the voltage between the sub's electrical ground and the appliance's ground can result in the hum. 

It can also be because of an irregular current flow in the audio cable. Increasing the volume extremely high can also be the reason. You can browse through the troubleshooting guide above to find the cause. 

Why Does The Sub Hum When Nothing Is Connected? 

Subwoofer loud noise when plugged in or even when nothing is connected is a common issue. But in most cases, it is easy to identify the cause when it is not connected. Start disconnecting the sub from everywhere except the power. 

After this, power the sub on. If you can still hear the hum, then there is no issue, and most likely, the sub needs replacement or repair. 

How To Deal With The Speaker Hum? 

There are many ways in which you can deal with the speaker hum. You can check the volume, the port, and the audio cable. Try updating the drivers and checking the transformer.

You can also try to fix the ground loop or frequency interference. Or you can try to change the audio settings. 

Why Is The Subwoofer Humming Continuously In The Car? 

People often wonder why does my subwoofer hum when I accelerate or normally as well. Several reasons can result in the subwoofer humming in your car. 

Why do active speakers hum and have no input for playing?

In most cases, the subwoofers hum or buzz because of poor grounding. And this is most likely because of faulty cases. You can try to switch the speakers to identify if the hum continues coming from one position. It will help you in tracing the source.

Couch Subwoofers: Can You Place Your Subwoofer Under Couch?

The subwoofer's placement has a major impact on the overall sound quality of the home theater system. Primarily it will help with the bass quality for which the subwoofer is responsible. And this is why many people wonder if they can place the Sonos sub under couch. 

So should you place your subwoofer between couch and wall? Let us dig deeper and find out more details in this article.

Subwoofer placed next to couch

Is It OK To Put The Subwoofer Under The Couch?

To get a great cinematic experience, the sub should radiate without restriction. Most audiophiles think of placing the subs below the couch. And this is prevalent primarily with downward-firing speakers

But under couch subwoofer wireless is not ideal unless your home theater is small. And in that case, you will have to get the best under couch subwoofer. 

If you live in the suburbs, this might work, as the couch will help transmit the bass to the ears of the listener through the chair. Moreover, the audio will re-bounce the floor space, providing an even better experience. 

But you might face issues with your neighbors as there will be sound leakage. Thus, you might have to soundproof your room and the home theater. 

For the best audio quality, the sub should ideally face the room. And this means the port ideally should be facing away. It will provide the subwoofer with room for its bass frequencies; thus, they can travel across the listening area. 

Subwoofer Under The Couch: Pros & Cons

Below are some of the pros and cons of placing a subwoofer underneath your couch.

ProsCons
If the home theater that you have is small, it will help you in saving much space. If you have a downward-firing speaker box, you will bother many people around you, including your neighbors. 
Great experience when the vibrations hit the sofa.The bass flow in the room will be improper.
With the subwoofer hidden, you have the scope for better decoration. Excessive vibration flowing through your floor. 
Probable overheating issue because of less space. 
If the sofa is not firm, the sub can damage. 

How to Find the Best Possible Position for My Subwoofer

Subwoofers provide low--frequency audio in a uniform manner for providing the best audio experience. But the audio quality will primarily depend on the sub placement.

To determine the ideal place for your subwoofer, it is better to place the sub at one end of the room. Play a sound of high-frequency and keep on moving while listening. 

Remove your sofa and place the sub in the same place for quick setup. Move around the room size to determine where you are getting the ideal sound quality. With this, you would have determined the best option for your sub's location; now, you can position your sofa accordingly. 

What To Do To Feel Bass Vibrations?

Many assume that placing the sub under the couch results in feeling the bass vibrations. But that is not true if you want to get an immersive experience. 

People also place the sub on the desks for the best vibration experience as they play music on their computers. Others like placing the sub behind the TV. 

But the truth is, in most of these cases, the bass will not travel properly, and thus the sound quality will not be the best.

However, placing the sub behind the couch will get the audio closer. You can feel the bass vibration while enjoying the clear audio performance. 

What is the Best Spot For the Subwoofer?

There are chances that your home theater is small, and you do not want to place the sub behind the couch. And you are still wondering what is the best place to get the best immersive audio experience?

You should remember that each home theater space is different. Sound waves travel differently in each of the different room placements. And thus, it is critical to use your ears and experiment to determine the best location for the sub. 

Move around your sub while playing high-frequency bass until you find the ideal position providing the perfect audio experience. 

Are There Any Subs You Can Place Under The Couch When You’ve Limited Space?

While you might not always get the best experience if you place the sub under the couch, that might be the only choice if you have limited space. 

Placing the sub under the sofa will also help ensure your room doesn't lose its aesthetic appearance. In these cases, you can get a dedicated soundbar with under couch subwoofer or a couch with built-in subwoofer. 

But ensure that the sub is not cramping beneath the couch, as it can impact the sound quality. But with ample space under the sofa, you will not have many issues as the bass can flow freely. 

The sub beneath the sofa is also a great option if the couch is placed against your wall and the home theater is small. If you place the sub under the sofa and want to minimize floor vibrations, you can isolate the sub from the ground or floor.

Does Having Furniture Impact The Subwoofer?

There are cases when people wonder what to do with a subwoofer blocked by furniture. It is tough to identify how furniture placement will impact the sub. It is always ideal for placing the sub in spacious areas without furniture blocking it for the best audio experience. 

Where To Not Place A Subwoofer?

Placing the sub around walls or small corners is possibly the worst idea. Placing it in the corner will not provide enough space to produce clear audio. Moreover, a noticeable unpleasant sound will occur if placed excessively close to the wall. 

Can I Place My Subwoofer In The Cabinet or On The Shelf?

There is nothing wrong with placing your sub on a shelf or within cabinets. But there will be visible damage to the shelf or cabinet with time because of the vibrations. You can minimize the impact by using vibration pads. 

Cases When You Can Put Your Sub Behind a Couch

You might have different reasons when considering placing the sub behind the couch. Though different opinions about the best possible sound experience exist, you should always test the location first. 

The sub's placement behind your couch will depend on its SPL rating. It will help ensure that the lower frequency response is within the target. 

Below are a few reasons why placing the sub behind your couch is an exciting option.

Optimal Sound Quality

A subwoofer placement should be in a way that provides superior sound quality. Finding the perfect placement position for your sub to get the most desirable performance can take time. 

Placing your sub behind a couch is a great idea. It will help in optimizing the sub's low-frequency signals. But make sure it is still some distance from the wall to have enough space for reverb. 

Omnidirectional Subwoofers

People often worry about the sub placement as it impacts the direction of the audio. But when it comes to the omnidirectional subs, they can send audio waves throughout your room.

Thus, the location has to be such that the distance of the sub from the room wall is enough. It should work great if you provide your sub room for breathing, with a minimum distance of 25 cm from the wall. 

Saving Space

Another reason you might choose to place the sub behind a couch is to save space. Home theaters are perfect but take up some useful space. Therefore, you have to arrange your sound systems so that they are functional as well as well-designed. 

Aesthetic Appeal

Not only does it help in saving space, but also increases the aesthetic appeal of the room. You can remove any visible clutter around the screen by placing the sub behind a couch. 

Better Cohesion Between The Sound System

Remembering the effect of placing the sub behind a couch on the overall sound system is vital. In most cases, placing it behind will have no change, with only some increase in the sound quality for low-frequency bass. 

Subwoofers Size

The bigger the sub, the better it will be to put it behind the couch. If your sub is high-power and large enough to carry the home theater's load, it can be put behind a couch. But remember that if it is a 2.1 set, it will be difficult to handle the bass. 

Speaker Frequency Requirement

If the speaker depends on the sub for all the frequencies, placing it behind the couch will not work. It will result in cracking noise from the speaker. It is always advisable to place the sub with the speaker. 

FAQs

Which Direction Should The Subwoofer Face?

The subwoofer face direction is also a critical point for you to consider. You can explore different directions to find the sweet spot with the best sound. Ideally, the bass should be facing the seating area. 

Can I Place The Sub On The Floor?

Though not ideal, placing the subwoofer on a hard floor will not be bad. It will result in more vibrations as the low frequencies are omnidirectional. 

What to Use Under The Subwoofer?

Frequencies from the speaker will be omnidirectional. Thus, you will get noise and vibrations if you place them on the floor. But it might be annoying for your neighbors. 

Placing the sub behind the couch, under the sofa, or anywhere else will not reduce vibrations. You will have to use some things to place under the sub rather than putting it directly on your floor. You can use isolation pads to keep the subwoofer. 

Can You Place The Subwoofer Behind A Sofa? 

Yes, you can put it behind your favorite chair or a couch, and it will provide you with deep bass. But make sure it has ample space for the sound to reverb and reflect. 

Can My Sub Get Blocked By Surrounding Furniture?

Yes, low end frequencies can diffract against your furniture resulting in a loss of bass response. 

Where To Not Put The Subwoofer? 

Never put the subwoofer in one corner of the room. Also, a closer look ensures that it is not very close to the wall and has ample space in between. Do not place it on the side of a wall. 

What Is The Ideal Location For Any Sub In The Living Room?

You can place the sub anywhere in your living room. The ideal placement depends on your sound requirement. For example, you can experiment with output from different locations to find the ideal one. Depending on the requirement, you can place it in the front of the room or back. 

Why Place The Subwoofer Under The Desk? 

Placing the strong woofer under the desk is not the best advice. First, the table will not always have enough space for the sub. Secondly, the vibration will significantly impact the other items around your desk.

Where To Put The Slim Subwoofer In The Home Theater?

Try experimenting with different locations to find the first place that provides the ideal performance and sound. One great way is to place the sub in one location and try listening to the sound from the various areas of the room. 

Is It Ok To Rest My Feet On My Sub?

It is not a good idea to place your feet on the sub. Though you will experience the bass on your feet, feet are usually dirtier than the body and can impact the conditions of the subwoofer and the long life.

LG Subwoofer Pairing: How to Connect with the Soundbar?

Getting a soundbar is a great option for some high sound quality. Soundbars come with speakers that help with great audio. 

But adding a subwoofer also enhances the audio quality further. It ensures that any low-pitched frequency or sub-bass gets reproduced. 

LG subwoofer pairing is simple processing in which you need a connection with multiple devices with the power cable. The LG wireless active subwoofer connection process is simple. But if you are facing issues, this article will surely help you. 

LG sounbar connected to LG subwoofer

Pairing The LG Soundbar With A Subwoofer For The First Time

There is no need to worry for people who have got a new sub for their soundbar. The process of wireless subwoofer connection is simple and takes seconds. Once the TV, subwoofer, and soundbar are ready, it is time to connect all of them together. 

Connecting the soundbar's and sub's power cord to the power outlet. Next, switch on the main unit and then switch on the sub. You will see a flashing green light on the sub. When you turn them on, the sub and soundbar will connect automatically. 

The Bluetooth of the sub gets switched on immediately after you plug in the power cord. And when it gets successfully connected, the LED light stops blinking and continues glowing. 

But there are cases when the LG subwoofer not pairing or LG subwoofer not working no light; then you will have to connect it manually. If the LG subwoofer blinking green doesn't stop, it is clear that the process is not working. 

Connecting the Subwoofer & the Soundbar Manually

Connecting the sub and soundbar manually requires some additional steps. 

Troubleshooting Soundbar Pairing Issues

It is possible that even after having an LG soundbar with subwoofer manual, you continue having a problem with the connection. Below are some steps that you can take for troubleshooting. 

10 Cases Where Soundbar Not Pairing & How To Fix Them

Even if your main unit is not getting linked with the other devices, there is nothing to worry about. Below are some actions that can help you in fixing the issue. 

1- When automatic pairing is not working

When you cannot pair the devices with the automatic pairing method, you must use the manual process.

The manual method is also easy to use, and as highlighted above, you only have to lower the volume, press the mute button, and then use the Bluetooth button behind the sound woofer to pair. It will work for LG wireless subwoofer only.

2- Signal Interference

When there are multiple wireless equipments around the same frequency, in these cases, there will be signal distortion, and thus the connection will not be strong. 

Some common devices that can cause distortions are:

You will have to switch off all the other devices.

3- Volume Issue

When the soundbar's volume is high, it can result in issues in connecting with the sub. When connecting both devices, ensure the soundbar's volume is turned down. 

4- Obstacle Between Sub And Soundbar

Ensure that there are no barriers between the sub and the soundbar. If there are barriers, the wavelengths between them will face issues connecting. 

Both devices should be placed close to each other and shouldn't be more than 15ft apart. 

5- Stop & Mute Button

When facing issues with the connection, you can try another way to connect both of them. Disable the sub's volume control and press the stop or mute button for a few seconds. It will make both devices discoverable for connection. 

6- Issue With The Flashing Light

If the LED light stops flashing, you must try repowering both devices to solve the issue. 

7- Pairing Button

When trying to check if your sub is in pairing mode, you can use the pairing button in the sub. Press it for a few seconds to get your sub into pairing mode. 

8- Unplug and Re-plug Everything

If you still face issues, you can try powering off the devices and removing the power cords. Later, try plugging them in again to see if it starts working. 

9- Connect the Devices to the Power

Start by connecting both of the devices to a source of power. Though the sub and the soundbar can work wirelessly, they need a power source. 

10- Rebooting the Sub & the Soundbar

The LG wireless subwoofer without soundbar or with a soundbar can behave weirdly in many cases. But fortunately, it has a simple fix. You can quickly restart all the devices to perform the "power cycling" action. It means you will switch off the equipment for some time and then turn it on again. 

FAQs

Why Is The Lg Subwoofer Starting To Blink Red?

It indicates that your connection has failed or the sub is currently on standby mode. 

Why Is My Subwoofer Not Connecting With The Soundbar?

There might be different reasons your sub might not connect with the soundbar. It is possible that there is signal interference or there is some barrier between the two. You can try any of the troubleshooting methods highlighted in the article. 

What Does It Mean When The Lg Subwoofer Blinks Green?

When the LG subwoofer blinks green, it is waiting to pair with another device. After pairing, it will turn into a steady light. If you see a green blinking light, your device is in pairing mode and looking for pairable devices. 

How To Know If The Lg Subwoofer Is Functioning Properly?

When your sub shows a steady green light, it reflects that the sub is working properly. When the music starts coming out of the soundbar, you can also get bass from the sub. 

How To Connect Lg Wireless Active Subwoofer To Phone?

Connecting the subwoofer to the phone is the same as connecting the sub to a soundbar. You have to follow the same step for the same. Once you switch on the sub and a green light starts blinking, check for the sub in your phone's list of available devices and then connect. 

Is It Possible To Pair Any Other Sub With The Lg Soundbar?

Most LG soundbars come with an integrated subwoofer. And if they do not have an integrated sub, they come with a bundled sub with an easy connection. 

How To Connect The Sub And The Soundbar Without Using The Remote Control?

Once you attach the power cords to all the components, ensure they are plugged into the socket. After this, check the sub's back for a button called "ID SET." Click on the button and wait for the LED light to blink constantly. 

How To Get Into The Pairing Mode In An Lg Soundbar?

You can use the Bluetooth function button when your soundbar is getting power. After you press it, the indicator will start blinking, highlighting it is ready to pair. 

Why Is My Sub Not Able To Connect With A Samsung Soundbar?

Try to connect the soundbar with the sub manually. Press the IDSET button in the back of the sub until you see a blue light blinking. 

Is It Possible To Pair Any Sub With Any Soundbar?

You cannot add a subwoofer with any wireless soundbar unless you have got them together or they are designed in a way to connect automatically. 

Is It Possible To Connect The Sub With My Amp?

You can connect the sub with your amplifier with the steps below. 

How Does The Subwoofer Function With The Soundbar?

The connections are easy and quick. After connecting, the sub will automatically start as the soundbar gets powered. Every sub comes with a cord that can also help you with the connection. 

How To Connect A Sub To The Lg Smart Tv? 

You can use the coax cable directly in the converter port to connect the subwoofer. After this, use an HDMI cable and plug it into the HDMI port of the sub. 

Is It Possible To Connect Two Subwoofers To A Single Soundbar?

Unfortunately, it is difficult to connect two subs to a single soundbar. 

How To Enable Bluetooth On The Lg Tv? 

Go to the Bluetooth menu. Select the output and power on the Bluetooth device while keeping it in pairing mode.

Can I Connect A Homemade Wireless Subwoofer To A Samsung Soundbar? 

You can control both with the help of any source device, including your laptop. 

How To Connect Two Different Soundbars Together? 

You can connect two different soundbars together by plugging one cable end into the output of one sound bar. And use the other end in the input of the second soundbar. But it is not advisable to do this as soundbars are meant to be self-sustained units. 

Can I Connect The Soundbar To My Tv Without An Hdmi?

If there is no HDMI, you can use optical or RCA cables or establish a wireless connection. 

Can I Connect My Soundbar To A Sky Q Box?

You can use an HDMI arc or an optical cable to establish a connection.