Sealing Subwoofer Boxes: How To Seal A Subwoofer Box?
For a subwoofer enclosure to reproduce low frequencies, it's important to seal it properly.
Sealing allows the air inside the box to act as a shock absorber. It helps the subwoofer to move back and forth with better control. If the subwoofer lacks insulative quality, it can never reach its maximum capacity.
You can seal the subwoofer enclosure using a variety of materials, including silicone, epoxy, liquid nails, Gorilla glue, and more.
Scroll down to know tips for a DIY sealed subwoofer box.

Should A Subwoofer Box Be Sealed?
A properly sealed subwoofer consists of a driver, an amplifier, and an enclosure. It has lower group delay, reduced ringing in the time domain, and less phase rotation.
As sealed subwoofer enclosures do not have a port to tune, they are easier to build and are smaller. They can reproduce better low-frequency responses. Additionally, they are good at rendering instrumentals.
Do Sealed Boxes Sound Better?
A sealed box resembles an airtight enclosure, housing the subwoofer. It is perfect for any music that requires accurate and tight bass. You can expect excellent power handling, flat response, and deep bass extension from it.
As a sealed subwoofer enclosure needs more power, one must use an amplifier wattage for better performance. Every beat of a tight bass sounds crisp and accurate.
How To Seal A Subwoofer Box
Are you wondering how to seal the subwoofer box? Easy. Gather all the materials and follow these tips carefully:
#1 Make Sure Box Cuts are Precise
The first step to sealing a sub box is ensuring the box cuts are precise and air gaps are kept to a minimum. Uneven edges and air gaps can decrease the ability to properly seal a subwoofer box.
If the box cuts are precise, clean, and straight, you can skip the sealant. Instead, you can seal the box using basic glue and a few screws.
#2 Use a Good Subwoofer Sealant
Following this, find an appropriate sealant for the subwoofer. As silicone is commonly available at home, it is widely used by people.
But if you don't have silicone, other possible options for good sealant include Gorilla glue, a caulking gun, liquid nails, and premium construction adhesive.
Each sealant has its advantages and disadvantages. Thus, you must carefully go through each of them to find the best sealant.
#3 Seal Inside the Box
When sealing a sub box, seal not only the seams but also the inside surfaces of the box. That's because, to some extent, the wood will be porous. It means the air can escape through the walls.
Using a water seal is the most recommended way to seal the inside of a sub box. For instance, you can use adhesive caulk, a water-based deck sealant. It easily washes up with water.
Or you can add weight damped inside the enclosure. If you do so, use silicate paste or fiberglass resin.
#4 Seal all Extra Holes
If your subwoofer has extra holes, air might escape from it. In this situation, you can use a gasket, a rubber sealant, or a plastic ring that properly fits around the hole.
#5 Ensure all the Gaps are Filled
Make sure all the gaps are filled. If you have used a polyurethane-based construction adhesive, it must foam up and fill the seams. You can also use epoxy putty to fill the holes and gaps quickly.
If holes are still visible after this step, redrill and use new screws to get a tighter seal. Then reach to the corners of the internal seam to check for gaps.
#6 Seal all Seams
By the time you reach this step, your sub box is ready to hold its shape. Use the subwoofer sealant to seal up all the edges. Remember to lay the sealant heavily on all seams using glue or sealant.
As each sealant has different properties, they take different amounts of time to cure. Do not rush the process, as the fumes from certain sealants can damage the speaker driver.
For instance, if you have used a silicone sealant, let it cure for around 24 hours or longer. Always check the cure time for the sealant before using it, so you allow the sub box to cure and set.
#7 Sand Away Excess Sealant
Once the sub box has cured, you can start sanding and adding an aesthetic finish to the box. You can use woof killer and wood putty or bondo.
#8 Screw Down the Box
The last step to sealing a box is screwing it down to make it airtight. You can use mechanical fasteners like screws, nails, or staples.
Subwoofer Sealant: What Is The Best Sealant For A Subwoofer Box
Several subwoofer sealants are available in the market, but the best is silicone. Why? Because it readily works and is easily available.
Silicone speaker sealant will work wonders if the sub box woodcuts are precise enough. But if the cuts are uneven and holes for air escape, using silicone as a sealant will not make sense. That's because silicone does not expand like polyurethane-based adhesives.
In terms of strength, silicone offers an enormous advantage. Once dry, silicone converts into a flexible rubber, which is difficult to crack.
Always follow the curing duration, which is at least 24 hours before mounting the subwoofer. You can even leave the sub box to cure for many days, so it cures properly and tightly.
If you install the sub box while the silicone subwoofer sealant is still wet, its vapor can cause damage to the drive. You can increase the silicone sealant's strength by combining it with acrylic latex. It also reduces silicone fumes. During the entire process, you must wear gloves.
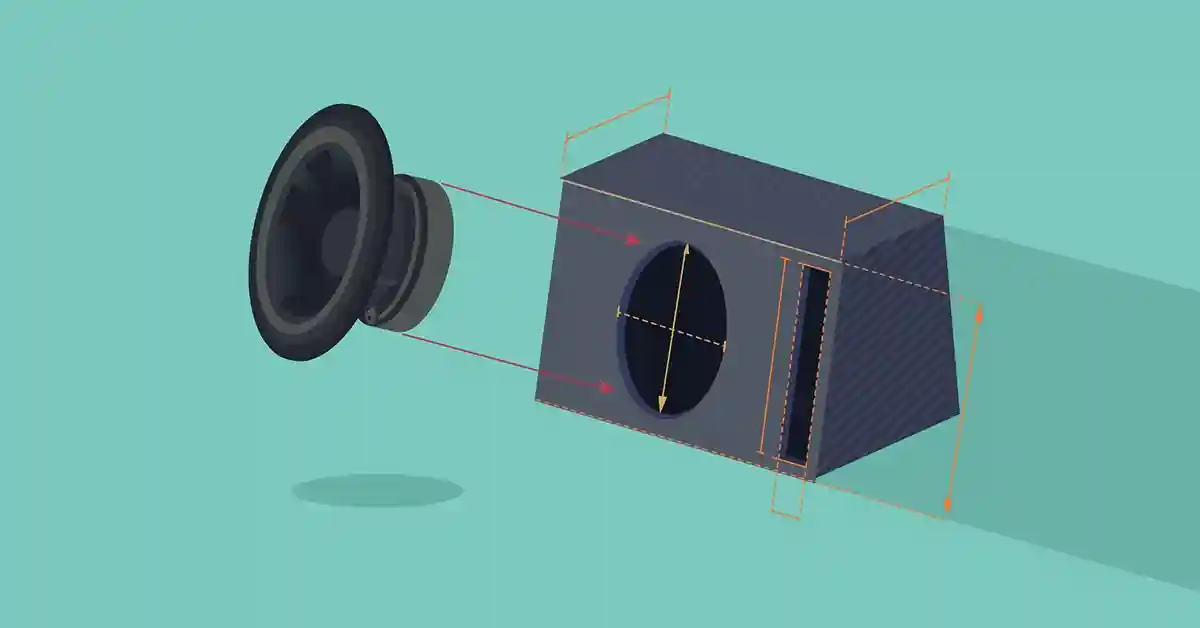
Sealed Subwoofer Box Vs. Ported
A sealed sub box is almost like an airtight enclosure, best for music with tight and accurate bass. It's comparatively smaller and offers a better listening environment. Compared to a ported box, the cone present in the sub box takes more power to produce the same volume.
On the other hand, a ported box uses a vent for low bass response. At a given amplifier wattage, it offers more output than a sealed subwoofer. It is perfect for heavy metal, rock, and hard-driving music.
Conclusion
You must use a proper sealant to seal the subwoofer enclosure to make it airtight. Additionally, screw the panels, so the air does not escape the box. You can purchase pretty much any kind of sealant but pay attention to the cure timing.

Related Articles